Microsoft Build 2018 Demo: Using the DocuSign C# SDK to integrate with Microsoft Visual Studio, Azure, and SharePoint
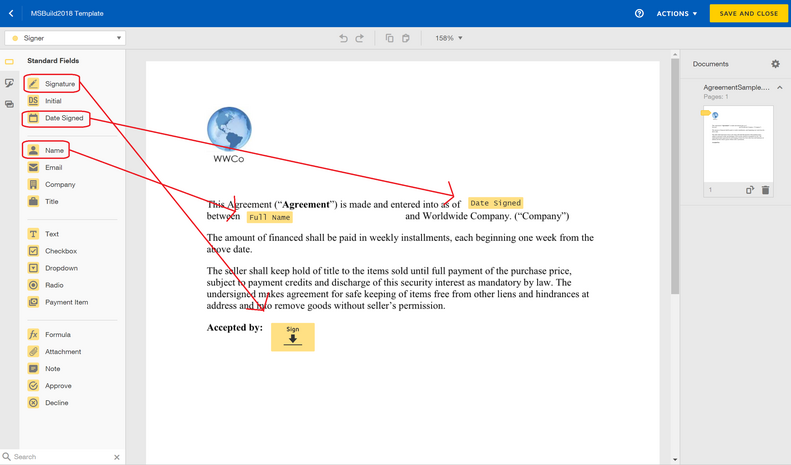
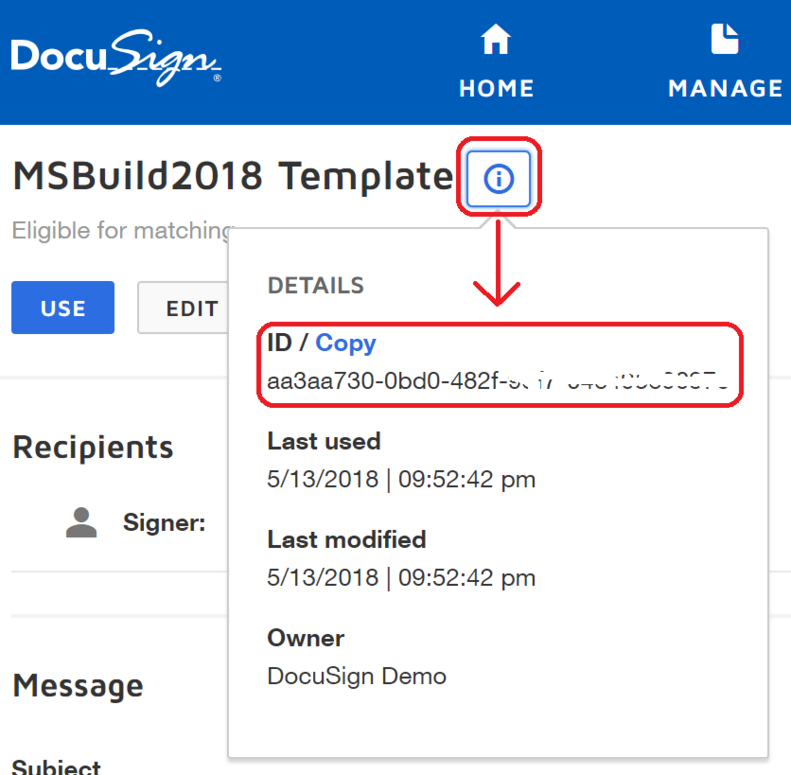
During the Microsoft Build 2018 conference, I presented to an audience of 70+ developers, along with my colleague Mihaela Cristina Cris, on how to integrate the DocuSign eSignature API into the Microsoft technology stack. We showed how to create a .NET console app to send a DocuSign envelope using our C# SDK. We also showed how to create a simple webhook listener with an Azure function to send DocuSign Connect messages when the envelope status changed. Finally, we showed how to download completed (signed) documents, again using the DocuSign C# SDK, and optionally uploading them into a SharePoint document library.
Ready: Preparing for the demo
In this blog post, we document what we showed at Microsoft Build 2018 so you can follow the steps from A-Z to setup and run the code yourself. We also made the code available in a GitHub repo here. If you have any questions about this demo or if you have any suggestions about other content you’d like to see, please email me at tony dot mann at docusign dot com (trying to avoid SPAM bots ?) or create a comment at the bottom of this post. Note that we don’t show you how to create a SharePoint document library. Uploading completed envelopes into a SharePoint document library is optional.
Set: Setting up the demo
In this section, we show you how to setup your environment. There are three different pieces to setup, each of which we cover in this blog:
- DocuSign
- Microsoft Azure
- Microsoft Visual Studio
DocuSign
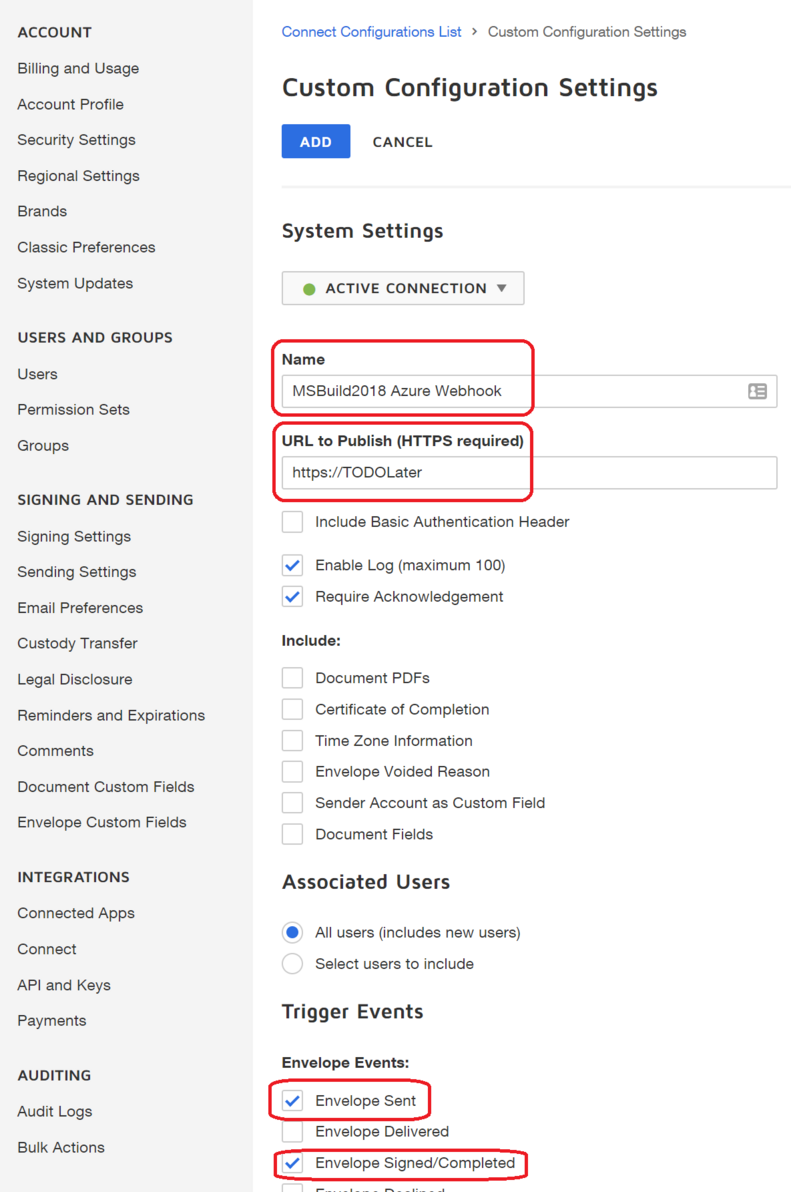
Within your DocuSign account, there are three tasks you’ll perform. First you’ll create a sandbox account and configure your app with an integrator key and other authorization parameters. Then you’ll authorize your account to use the integrator key as a service integration with a one-time approval. You’ll upload a document as a reusable template, then finally configure DocuSign Connect with webhook parameters so you can monitor envelope status.
Creating and configuring a sandbox account
To begin, you create and setup your DocuSign account, as outlined in the following steps:
- Create a DocuSign sandbox account. The first thing you’ll need is a DocuSign sandbox account. If you already have one, you can skip this step. In a sandbox account (also called a demo account), you can tryout all DocuSign features, including our eSignature API. We don’t ask for a credit card number and your account never expires. The only caveat is that you can’t use a sandbox account for legally-binding documents. In fact all documents sent from a sandbox account have a watermark indicating as such. To create a sandbox account, click here and simply follow the instructions – It’s very straightforward.
- Create and configure an integrator key.
An integrator key is needed for developing with any of our APIs. When you configure an integrator key, you also specify the security keys and passwords that your app will use during the OAuth2 authentication flow process. Here are the steps to create an integrator key:
- Login to your sandbox account that you created in step #1.
- Click your picture icon on the top-right, then click Go to Admin. The Admin dashboard appears.
- Scroll down to INTEGRATIONS section and click API and Keys.
- In the My Integrator Keys section, click the ADD INTEGRATOR KEY button.
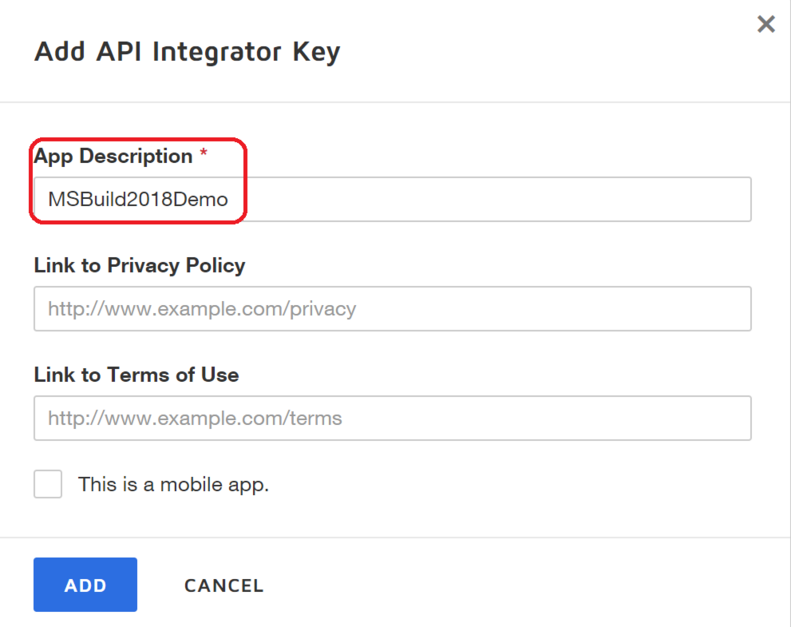
- Enter the name of your app in the App Description field. For this example, we entered MSBuild2018Demo, like this:
- Click the ADD button, which creates a unique integrator key (32-byte GUID) value, assigns it to your App Description in your account, and also expands the screen to prompt for additional configuration information, like this:
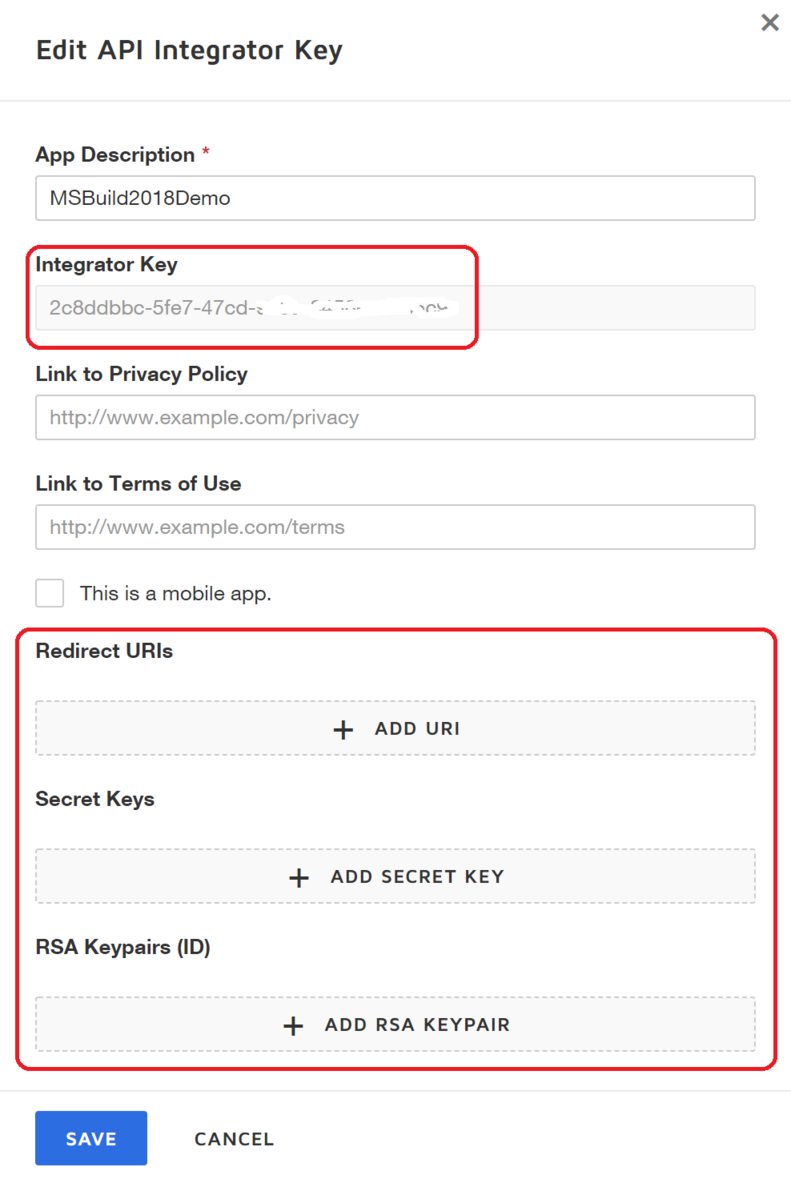
- For this post, we show you how to use JWT authentication, which is typically used for service integrations, but there are other types of authentication you can use, based on your scenario and use-cases. You can review those scenarios in our Developer Center in the REST API Authentication Overview topic. For JWT authentication, you won’t need a secret key, but you will need a redirect URI and an RSA keypair.Note: This example assumes you will grant individual user consent to use an account, but if your account administrator grants consent for your app at the organization level (known as Org Admin), you won’t need a redirect URI.
- Click the ADD URI button and enter the redirect URI for your application. In an OAuth Authorization Code or Implicit Grant flow, the redirect URI is used on the initial request to the DocuSign authentication server to verify the URI is authorized. For this example, we simply entered https://www.docusign.com.
- Click the ADD RSA KEYPAIR button. This automatically generates a private and public key pair. Copy both of these keys to a file because, for security reasons, you won’t be able to view these again. For this example, you’ll only need the private key though. You’ll store the private key a file named PrivateKey.txt file that will be referenced in your Visual Studio C# code. Click OK to return to the Edit API Integrator screen. Here’s what it looks like after you configure your app:
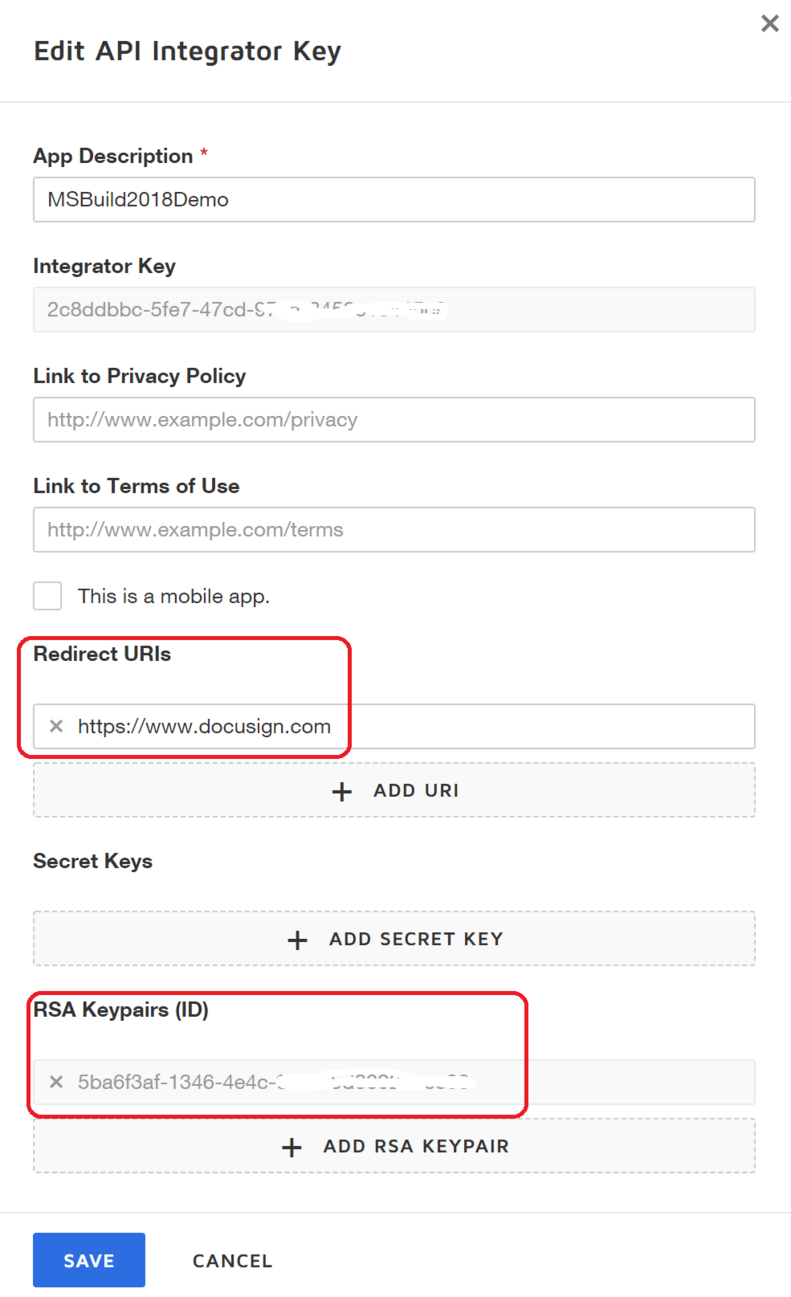
- Click the SAVE button and your app/integrator key will be updated and placed onto your dashboard, like this:
 Your app and integrator key is now configured in your DocuSign account.
Granting user consent: authorizing your app to use your account
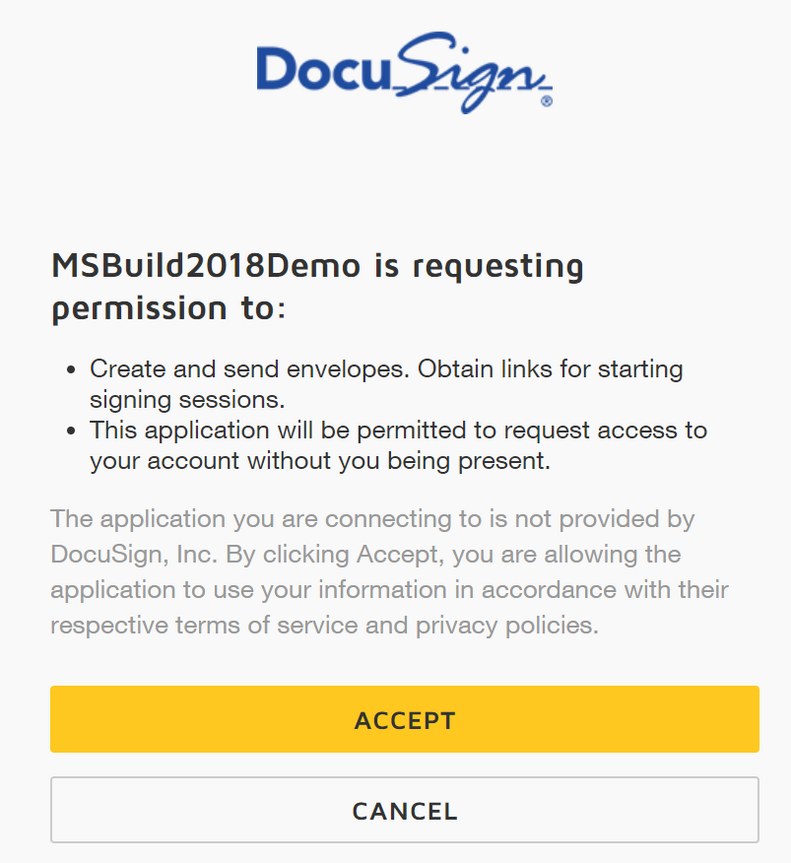
After creating the required parameters for your app, including integrator key, redirect URI, and an RSA key pair, you need to perform a one-time authorization for your app to use your login credentials as a service integration, known as granting user consent. This is a very simple operation whereby you enter a specific URL into your browser and you’ll be prompted to login to authorize the app by following these steps:
- Open a web browser and paste this URL into the address bar:
